Call us on +254724495659 or +254708744335 to place your order.
Call us on +254724495659 or +254708744335 to place your order.

Hotline Order:

Email ID:
sales@scartek.co.ke
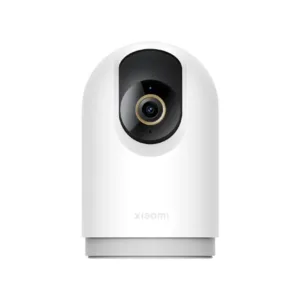
Xiaomi Mi Computer Monitor Light Bar
Original price was: KSh8,499.KSh7,999Current price is: KSh7,999.
- Space-SavingEasily attach the Mi Computer Monitor Light Bar to your monitor and save space on your desk.
Angled design for a more comfortable experience with no screen reflection
The custom-made optical glass and finely textured hood ensure that you can work for extended periods of time without being troubled by glare.
Adjustable brightness and color temperature via remote control
The remote used a 2.4 GHz wireless connection that lets you adjust the color temperature and brightness according to your preference.
USB Type-C Port
When connected to your computer, the light automatically turns on as your computer turns on.
-
Extracting the PCB
- Remove the lamp bar from the the magnetic mount on top of your monitor.
- Locate the small rectangle shaped protrusion from the lamp tube that mates with the magnetic mount. The protrusion has two small pogo pins on it.
- With the protrusion facing you, locate the plastic cap closest to the product information. This should be plastic cap on the left side of the tube.
- Use pliers or similar to grip the plastic cap.
- Twist the cap to break the glue. Do not twist more than a few degrees! The plastic cap has some features that will come into contact with and could damage the PCB if rotated too far!
- The plastic cap should be loose enough to pull off by hand. Do so without rotating more than necessary!
- You should be greeted with two more pogo pins that interface with a small antenna on the inside of the plastic cap. If you don’t see this, you removed the wrong cap. Set cap aside.
- Use a razor blade or similar to peel back the grip-tape sticker on the protrusion. Underneath the sticker will be two small philips screws. If you’re careful and manage to remove the sticker in one piece you might be able to re-apply it during reassembly. The lamp functions fine without the sticker, though.
- Remove the two small screws that were underneath the sticker. The metal protrusion and small plastic part containing the two pogo pins should come free. Set these aside.
- In good lighting, use a camera or other means to note how both the plastic diffuser and PCB are installed into the aluminum tube.
- Gently remove the clear plastic diffuser from the lamp tube and set aside. The matte finish on the interior side of the diffuser is a fingerprint magnet. Consider using clean gloves for this step.
- Carefully slide the PCB out of the aluminum tube. Be mindful of the two spring like contacts on the back of the PCB that mated with the pogo pins!
Repeat these steps in reverse order to re-assemble the lamp.


